
12 KiB
Name
双盈止损均线交叉量化策略Dual-Take-Profit-Moving-Average-Crossover-Quantitative-Strategy
Author
ChaoZhang
Strategy Description
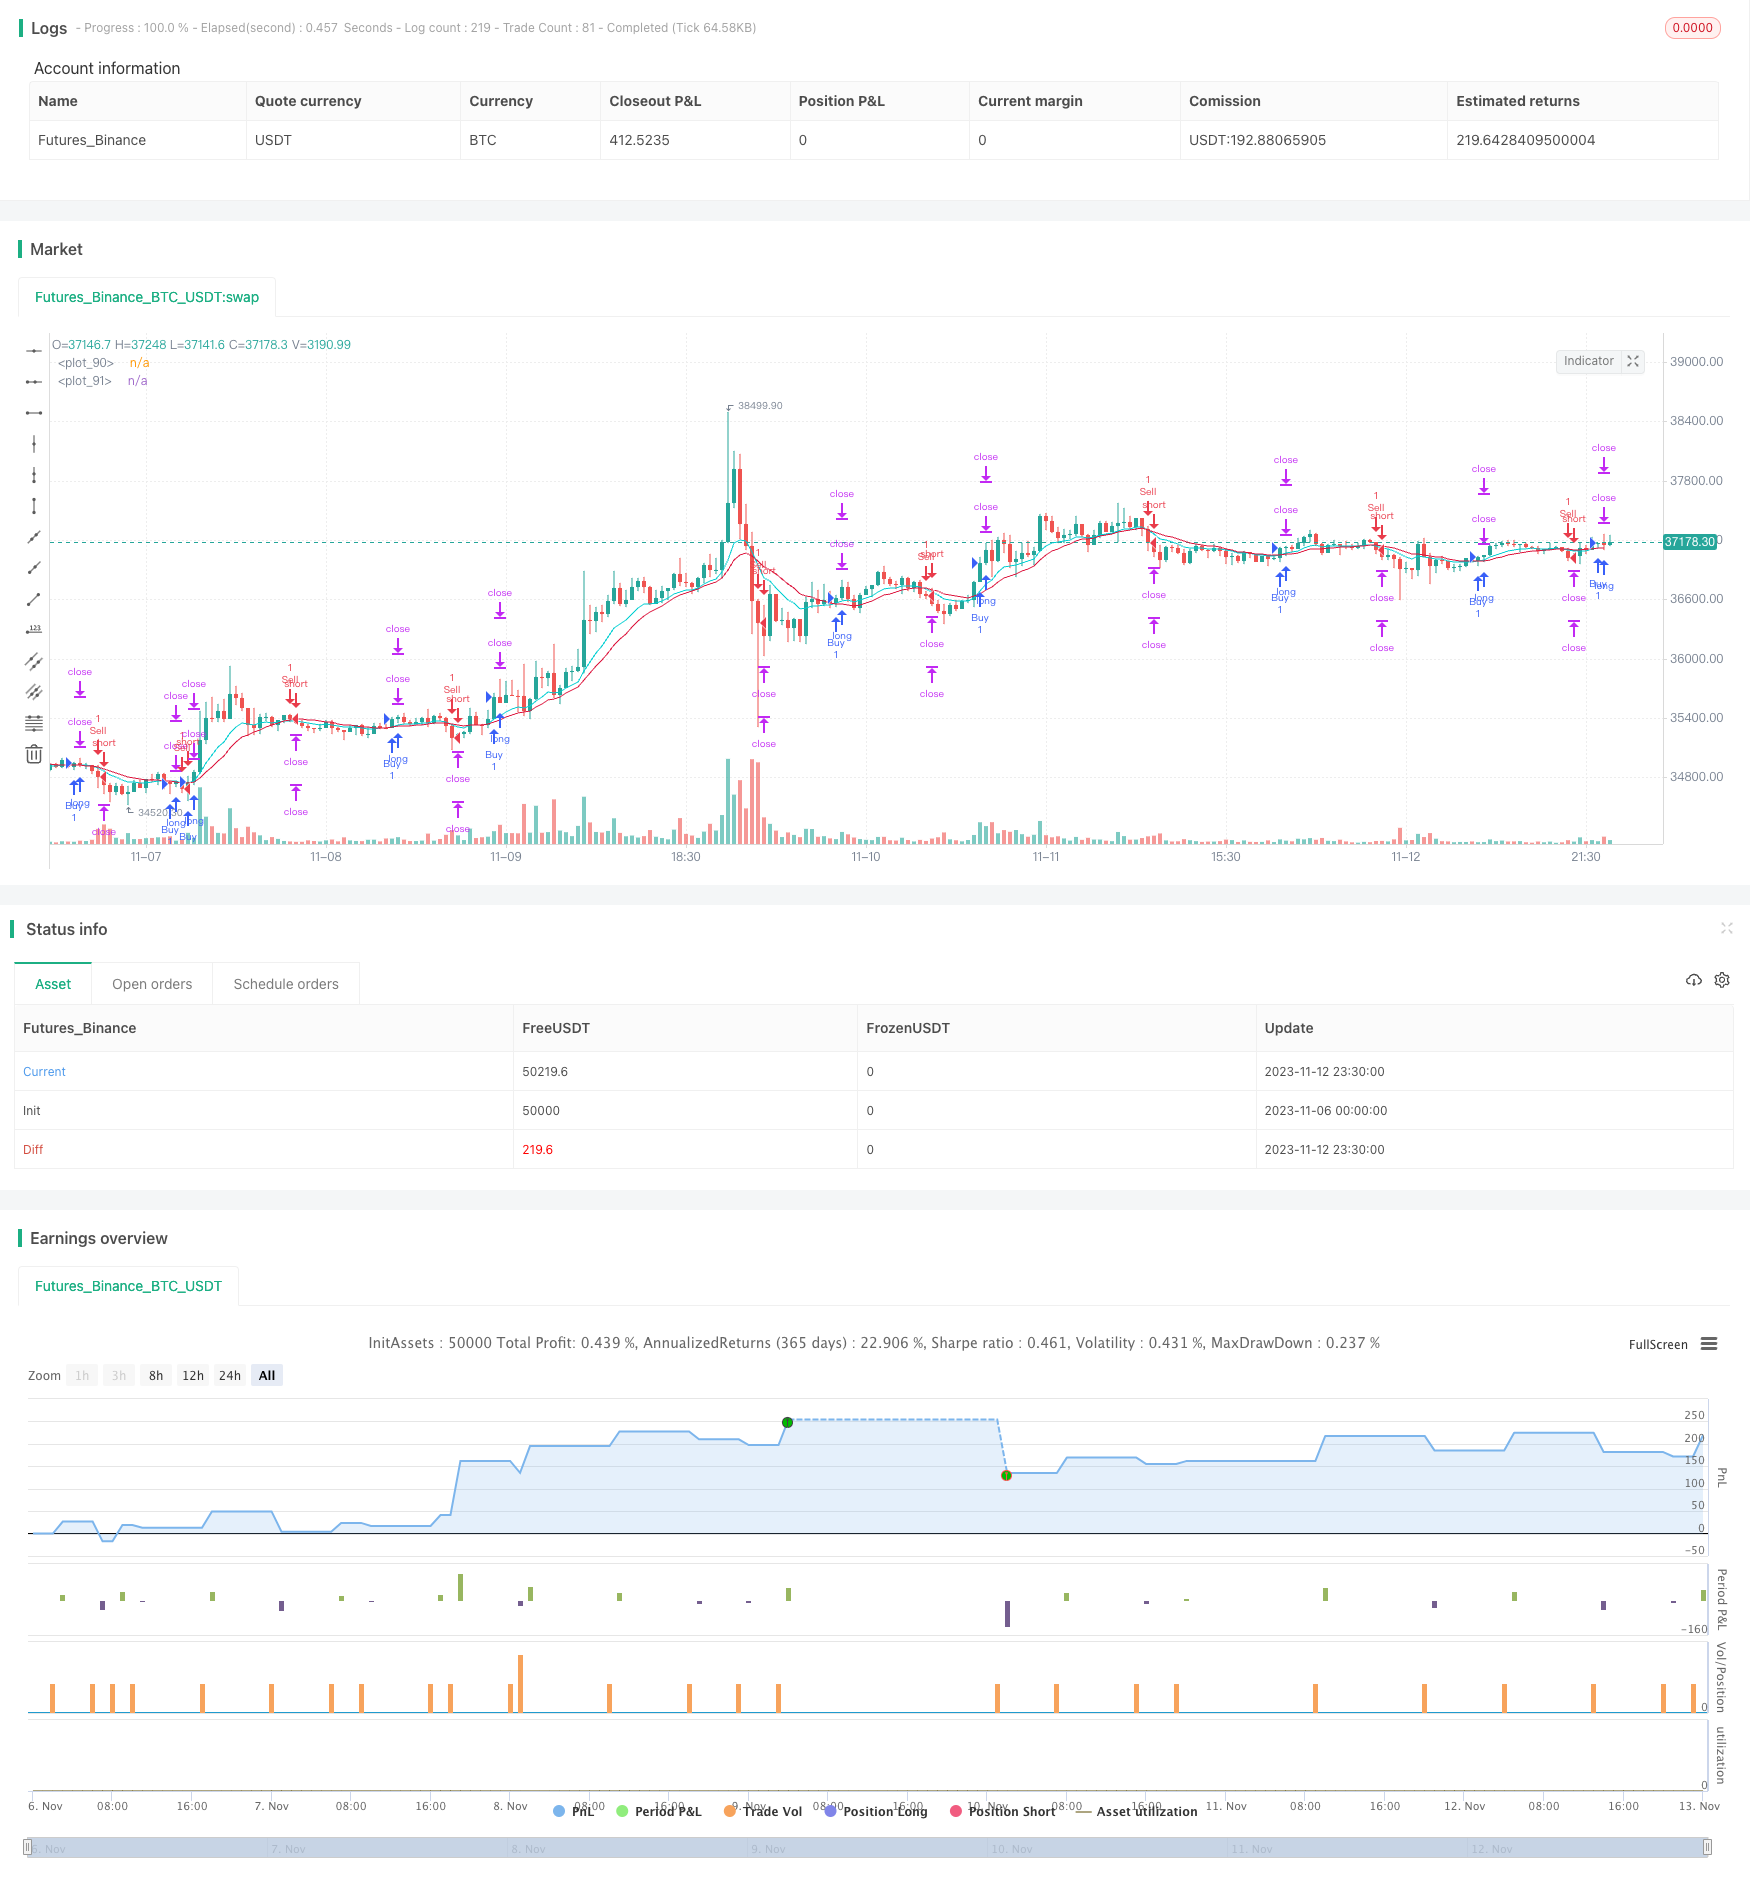 [trans]
概述
本策略运用了简单移动平均线交叉和双重止盈技巧,旨在控制风险、提高获利概率。策略适合中短期交易,可以在趋势变化时捕捉机会。
策略原理
该策略基于EMA和WMA的交叉来判断行情走势。当EMA上穿WMA时,做多;当EMA下穿WMA时,做空。
每次开仓时,策略会设置两个止盈水平。第一个止盈水平固定为开仓价格+20点,第二个止盈水平固定为开仓价格+40点。同时设置一个止损水平,固定为开仓价格-20点。
当价格触碰第一个止盈水平时,平仓一半头寸。剩余头寸继续持有,追求第二个止盈水平或被止损。
这样,每个交易有三种结果:
-
价格触发止损,直接亏损2%。
-
价格先触发第一个止盈,平一半头寸,锁定1%利润,然后继续运行直至被止损,最终收支平衡,零利润。
-
价格触发第一个止盈后继续运行,再触发第二个止盈,最终获得1%+2%=3%的盈利。
优势分析
这种双盈止损策略最大的优势是可以控制风险,避免单次大亏损。当行情不利时,止损可以把损失控制在2%以内。当行情阳光时,两个止盈水平可以获取较大利润。
相比单一止盈止损,该策略有三种结果:亏损、盈利和不亏不赚,降低了止损的概率。即使止损,最大损失也控制在2%。相比传统止盈止损策略,这种双盈止损策略可显著降低DD和提高胜率。
另一个优势是操作简单。EMA和WMA都是广为人知的指标,容易理解。止盈止损逻辑非常清晰,可以方便监控。这让策略容易被量化交易初学者接受和实施。
风险分析
尽管该策略有一定优势,也存在一些风险需要关注。
首先,EMA和WMA作为均线指标,对震荡行情识别能力较弱。当趋势不明显时,可能产生较多错信号,导致过于频繁交易。
其次,固定的止盈止损点位可能与市场波动不匹配。当波动较大时,止盈止损可能会被突破,无法起到保护作用。
最后,该策略无法响应突发事件,存在被套利的风险。重大新闻事件发生时,行情可能出现大幅跳空,直接击穿止盈止损线,造成较大亏损。
优化方向
可以从以下几个方面进一步优化该策略:
-
改进进入信号。可以尝试比EMA和WMA更优秀的均线指标或趋势指标,提高信号质量。
-
动态调整止盈止损位。可以根据ATR、移动止损等方式实时调整止盈止损点位,使其能动态跟随市场。
-
增加过滤条件。可以在金叉前添加交易量或者副指标的确认,避免被套。也可以根据重大事件日历选择是否交易。
-
优化仓位管理。可以根据资金管理原则优化每次交易的具体仓位大小。
总结
本策略总体来说是一个简单实用的趋势跟踪策略。它使用EMA和WMA形成交易信号,并采用双重止盈技巧控制风险。相比传统策略,具有获利概率更高、风险更低的优势。当然,也需要注意指标局限性和止盈止损设置的风险。通过进一步优化,可以使该策略更稳定可靠。
||
Overview
This strategy utilizes simple moving average crossover and dual take profit techniques to control risk and increase profitability. It is suitable for medium-term trading and capturing opportunities during trend changes.
Strategy Logic
The strategy is based on EMA and WMA crossover to determine market trends. It goes long when EMA crosses above WMA, and goes short when EMA crosses below WMA.
Upon entry, two take profit levels are set. The first take profit is fixed at entry price + 20 pips, and the second take profit is fixed at entry price + 40 pips. Meanwhile, a stop loss is placed at entry price - 20 pips.
When price hits the first take profit, it will close out half of the position. The remaining position will keep running towards the second take profit or until stopped out.
There are three possible outcomes for each trade:
-
Price hits stop loss, takes 2% loss directly.
-
Price hits first take profit first, closes half position locking 1% profit, then keeps running until stopped out, ending with break even.
-
After hitting first take profit, price keeps running and hits second take profit, ending with 1% + 2% = 3% total profit.
Advantage Analysis
The biggest advantage of this dual take profit strategy is that it controls risk and avoids huge single loss. Stop loss caps maximum loss within 2% when market moves against. The two take profits allow bigger gain when trend goes as expected.
Compared to single take profit/stop loss, this strategy has three outcomes - loss, win or break even, reducing the probability of stop loss. Even if stopped out, max loss is limited to 2%. Compared to traditional strategies, the dual take profit mechanism significantly reduces DD and improves win rate.
Another advantage is its simplicity. EMA and WMA are well-known indicators that are easy to understand. The take profit/stop loss logic is straightforward to monitor. These make the strategy easy to be adopted by beginners.
Risk Analysis
Despite the advantages, there are also risks to be aware of for this strategy.
Firstly, as moving average indicators, EMA and WMA have relatively weak capabilities in identifying ranging market. Too many false signals may occur when trend is unclear, leading to over-trading.
Secondly, the fixed take profit/stop loss levels may not adapt to market volatility. They could be penetrated easily during high volatility, rendering them ineffective.
Lastly, the strategy cannot respond to unexpected events, with risk of being trapped. Major news events can create huge price gaps that directly breach the profit/loss levels, causing huge losses.
Optimization Directions
There are several aspects to further optimize the strategy:
-
Improve entry signals. Test better moving average or trend indicators than EMA and WMA to generate higher quality signals.
-
Dynamically adjust take profit/stop loss. Use methods like ATR, trailing stop loss etc to make profit/loss levels adapt to markets.
-
Add filters. Require volume or secondary indicator confirmation before crossover to avoid traps. Also consider whether to trade around major events.
-
Optimize position sizing. Fine tune position size according to capital management rules.
Conclusion
In summary, this is a simple and practical trend following strategy. It utilizes EMA and WMA crossover for entries, and dual take profit to control risks. Compared to traditional strategies, it has higher win rate and lower risk. Of course, limitations of the indicators and profit/loss settings should be watched out for. Further optimizations can make the strategy more robust.
[/trans]
Strategy Arguments
| Argument | Default | Description |
|---|---|---|
| v_input_1 | true | Buy |
| v_input_2 | true | Sell |
| v_input_3 | 2019 | Start year |
| v_input_4 | true | Start month |
| v_input_5 | true | Start day |
| v_input_6 | false | Start hour |
| v_input_7 | false | Start minute |
| v_input_8 | false | set end time? |
| v_input_9 | 2019 | end year |
| v_input_10 | 12 | end month |
| v_input_11 | 31 | end day |
| v_input_12 | 23 | end hour |
| v_input_13 | 59 | end minute |
| v_input_14 | 10 | EMA period |
| v_input_15 | 20 | WMA period |
| v_input_16 | 20 | a |
| v_input_17 | 40 | b |
| v_input_18 | 10 | Risk per trade% |
Source (PineScript)
/*backtest
start: 2023-11-06 00:00:00
end: 2023-11-13 00:00:00
period: 30m
basePeriod: 15m
exchanges: [{"eid":"Futures_Binance","currency":"BTC_USDT"}]
*/

//@version=4
strategy("FS ATR & PS (MA)", overlay=true)

// Strategy
Buy  = input(true)
Sell = input(true)

// Time Period
start_year   = input(title='Start year'   ,defval=2019)
start_month  = input(title='Start month'  ,defval=1)
start_day    = input(title='Start day'    ,defval=1)
start_hour   = input(title='Start hour '  ,defval=0)
start_minute = input(title='Start minute' ,defval=0)
end_time     = input(title='set end time?',defval=false)
end_year     = input(title='end year'     ,defval=2019)
end_month    = input(title='end month'    ,defval=12)
end_day      = input(title='end day'      ,defval=31)
end_hour     = input(title='end hour'     ,defval=23)
end_minute   = input(title='end minute'   ,defval=59)

// MA
ema_period   = input(title='EMA period',defval=10)
wma_period   = input(title='WMA period',defval=20)
ema = ema(close,ema_period)
wma = wma(close,wma_period)

// Entry Condition
longCondition  =
 crossover(ema,wma) and Buy and
 nz(strategy.position_size) == 0 and
 time > timestamp(start_year, start_month, start_day, start_hour, start_minute) and
 (end_time?(time < timestamp(end_year, end_month, end_day, end_hour, end_minute)):true)

shortCondition =
 crossunder(ema,wma) and Sell and
 nz(strategy.position_size) == 0 and
 time > timestamp(start_year, start_month, start_day, start_hour, start_minute) and
 (end_time?(time < timestamp(end_year, end_month, end_day, end_hour, end_minute)):true)

// Exit Condition
a = input(20)*10
b = input(40)*10
c = a*syminfo.mintick
d = b*syminfo.mintick

long_stop_level     = float(na)
long_profit_level1  = float(na)
long_profit_level2  = float(na)
long_even_level     = float(na)

short_stop_level    = float(na)
short_profit_level1 = float(na)
short_profit_level2 = float(na)
short_even_level    = float(na)

long_stop_level     := longCondition  ? close - c : long_stop_level     [1]
long_profit_level1  := longCondition  ? close + c : long_profit_level1  [1]
long_profit_level2  := longCondition  ? close + d : long_profit_level2  [1]
long_even_level     := longCondition  ? close + 0 : long_even_level     [1]

short_stop_level    := shortCondition ? close + c : short_stop_level    [1]
short_profit_level1 := shortCondition ? close - c : short_profit_level1 [1]
short_profit_level2 := shortCondition ? close - d : short_profit_level2 [1]
short_even_level    := shortCondition ? close + 0 : short_even_level    [1]

// Position Sizing
Risk = input(defval=10, title="Risk per trade%", step=1, minval=0, maxval=100)/100
size  = 1

// Strategy
if longCondition
    strategy.entry("Buy"  , strategy.long, qty=size)
    strategy.exit ("Exit1", stop=long_stop_level, limit=long_profit_level1, qty=size/2)
    strategy.exit ("Exit2", stop=long_stop_level, limit=long_profit_level2)

if shortCondition
    strategy.entry("Sell" , strategy.short, qty=size)
    strategy.exit ("Exit3", stop=short_stop_level, limit=short_profit_level1, qty=size/2)
    strategy.exit ("Exit4", stop=short_stop_level, limit=short_profit_level2)

// Plot
plot(strategy.position_size <= 0 ? na : long_stop_level    , color=#dc143c, style=plot.style_linebr, linewidth=1)
plot(strategy.position_size <= 0 ? na : long_profit_level1 , color=#00ced1, style=plot.style_linebr, linewidth=1)
plot(strategy.position_size <= 0 ? na : long_profit_level2 , color=#00ced1, style=plot.style_linebr, linewidth=1)
plot(strategy.position_size <= 0 ? na : long_even_level    , color=#ffffff, style=plot.style_linebr, linewidth=1)
plot(strategy.position_size >= 0 ? na : short_stop_level   , color=#dc143c, style=plot.style_linebr, linewidth=1)
plot(strategy.position_size >= 0 ? na : short_profit_level1, color=#00ced1, style=plot.style_linebr, linewidth=1)
plot(strategy.position_size >= 0 ? na : short_profit_level2, color=#00ced1, style=plot.style_linebr, linewidth=1)
plot(strategy.position_size >= 0 ? na : short_even_level   , color=#ffffff, style=plot.style_linebr, linewidth=1)
plot(ema,color=#00ced1)
plot(wma,color=#dc143c)
Detail
https://www.fmz.com/strategy/432112
Last Modified
2023-11-14 16:04:33